
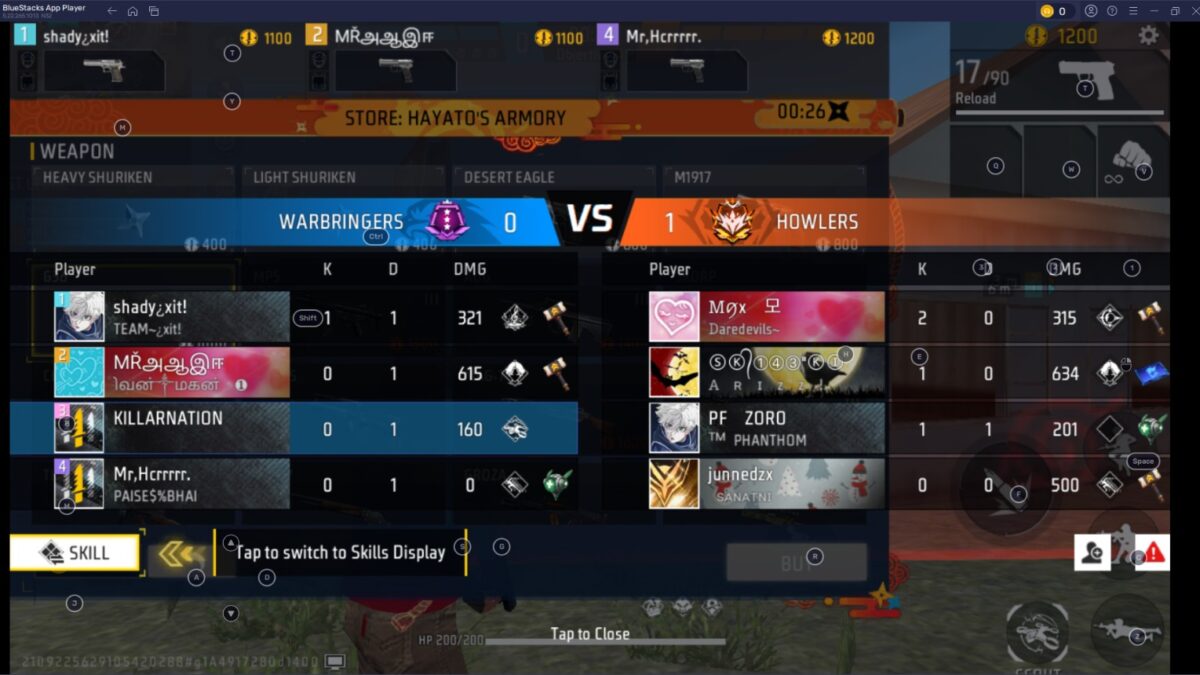
Looking for Free Fire Clash Squad tips and tricks that actually win ranked rounds? This guide covers Clash Squad economy, the best weapons, character combos, sensitivity, map control and clutch plays for the OB55 meta, based on my own gameplay on this ID.
Quick Summary (TL;DR)
- Round 1: keep the free Double USP and buy a Gloo Wall + Flashbang. Skip the G18.
- Never eco into a 0-4 loss. At 0-3, full-buy in Round 4.
- Best CS weapons: MP40, Groza, M1887, AWM and UMP.
- Best active skills: Alok for rushers, Chrono for anchors, reworked Kenta against Gloo Walls.
- From Round 3, spend 200-400 coins per round on Flame and Sonar grenades.
- Check teammates’ coins and drop a gun for anyone who is broke.
Why Clash Squad Is Not Battle Royale
Clash Squad is a 4v4 round-based mode. First team to win 4 rounds takes the match. Each round, everyone starts fresh with a fixed coin pool, buys weapons and armor from the shop, and fights until one side is eliminated. There’s no looting buildings. No zone luck. No sneaking into top 10 with zero kills.
The single mechanic that changes everything: economy compounds. Win Round 1 and you get more coins for Round 2. Lose Round 1 and you’re making desperate decisions with 800 coins while the enemy rolls in with SMGs and Level 2 armor. One bad pistol round cascades into three consecutive losses if you don’t know how to manage an eco round.
The four things CS actually tests, and this is what separates it from BR completely:
- Aim consistency: every engagement is a direct gunfight, no third-party cleanup.
- Positioning: whoever holds the better angle wins before the fight starts.
- Economy decisions: what you buy in Rounds 1-3 determines whether you can compete in Rounds 5-7.
- Team coordination: four randoms rushing independently isn’t aggression, it’s noise.
Of those four, economy is the one almost nobody talks about, and it’s the one that decides the most rounds at Diamond and above, where everyone’s aim is reasonably close.
Common Trap
Players who only grind BR carry bad habits into CS. They treat it like a shorter Battle Royale: camping edges, avoiding fights, hoarding resources. In CS, you win rounds by eliminating the other team, and each round resets your gear if you die. Playing passive here isn’t survival: it’s a slow way to lose 0-4.
What Changed in Clash Squad with OB55
OB55 dropped on September 16, 2026, and the Clash Squad changes are the biggest in at least three patches. The Naruto Shippuden collaboration brings cosmetic chaos, but the mechanical changes underneath are what shift the competitive meta.
Two New Grenades That Change Everything
New: Flame Grenade
Creates a burning area on landing that lasts 6 seconds and expands over 1 second. Enemies inside take 16 damage + 10% armor durability loss every 0.5 seconds. Allied players caught in it also take friendly fire: 8 damage and 10% armor loss per 0.5 seconds. The biggest deal: it melts Gloo Walls at 100 damage every 0.5 seconds. That means a single Flame Grenade destroys a gloo wall in under a second. The entire defensive meta just changed.
New: Sonar Grenade
Scans enemies within a 10-meter radius and reveals their outlines, including behind cover, for 3 seconds. This is the info tool that Clash Squad never had. Throw it before pushing a building and you see exactly where everyone is standing. No more blind pushes. No more getting ambushed around a corner you should have cleared first.
Kenta Rework: New CS Meta Pick
Kenta’s old ability was niche. The new one is built for Clash Squad. His reworked skill fires a tempest forward that passes through Gloo Walls, travels for 8 seconds, and deals 25 damage to enemies hit. Activate the skill again and Kenta teleports to the tempest’s location, gaining a shield with 20% damage reduction for 5 seconds. Cooldown is 45 seconds. In practice, this means Kenta can punish anyone hiding behind a gloo wall and then teleport to a new position, exactly the kind of burst repositioning that wins CS rounds.
Character Balance Shifts
Luna’s fire-rate bonus has been nerfed. Wukong’s cooldown received a buff, making his clone-and-reposition play more viable in CS. Morse has been nerfed as well. The takeaway: if you were running Luna as a passive, swap her out for the moment. Kenta (reworked) and Wukong (buffed) are worth testing in your CS builds this season.
Clash Squad Economy Guide: What to Buy Each Round
This is the section that will change your CS rank faster than anything else in this guide. The decisions you make in the buy phase of Rounds 1, 2, and 3 directly determine whether you can compete in Rounds 5, 6, and 7.
Round-by-Round Buy Strategy
| Round | Scenario | Coins Available | What to Buy | Why |
|---|---|---|---|---|
| Round 1 | Start | 500 | Keep free Double USP + Gloo Wall (200) + Flashbang (200) | The G18 costs 300 and is worse than the free USP. Utility wins pistol rounds, not a sidegrade pistol. |
| Round 1 | Confident aim | 500 | M500 (400) + save 100 | One headshot = instant kill on unarmored enemies. High risk, high reward. |
| Round 2 | Won R1 | 1,500–2,000 | MP40 or Thompson + Level 2 Helmet + 1 Gloo Wall | You have a massive gear gap. The enemy might still be on pistols. Press the advantage hard. |
| Round 2 | Lost R1 | ~800 | Desert Eagle (800) + play passive | Don’t panic buy. One Deagle headshot can steal an enemy weapon. That stolen MP5 becomes your Round 3 loadout. |
| Round 3-4 | Winning | 3,000+ | Full loadout: AR/SMG + Level 2 Vest + 2 Gloo Walls + Grenade | Snowball the economy lead. Deny the enemy any chance to catch up. |
| Round 3-4 | Losing | 1,000–1,500 | Budget SMG (MP5/Thompson) + 1 Gloo Wall | Loss streak bonus gives you enough to compete. Don’t eco into a 0-4: buy and fight. |
| Round 5-7 | Any | 5,000+ | Best available AR + sniper or shotgun + Level 3 Vest + 3-4 Gloo Walls + all grenades | Late rounds = full spend. Repair your vest. Buy mushrooms for EP. Stack Flame and Sonar grenades. |
| Round 7 | Tied 3-3 | Everything | Spend every single coin. Max grenades, repair vest, mushrooms. | There is no “next round” to save for. This is the final. |
The Drop System: Teamwide Economy
Before you buy, check your teammates’ coin count. If three players have 2,000 coins each and one teammate has 300, buy two guns and drop the cheaper one for the broke player. A team where everyone has a real weapon beats a team where three players are loaded and one is running a pistol.
Pro Tip
In OB55, the Flame Grenade and Sonar Grenade are available in the CS shop. Budget at least 200-400 coins per round for utility grenades from Round 3 onward. A Sonar Grenade before a push gives you 3 seconds of wallhack-level intel. A Flame Grenade thrown at a gloo wall deletes the cover and the player behind it. These are worth more than a helmet upgrade in many situations.
Best Weapons in Clash Squad After OB55
The 2026 weapon meta is built around speed, armor penetration, and Gloo Wall counters. Out of 50+ weapons in the game (browse them all on our Free Fire guns page, and see the OB55 new weapons too), seven dominate ranked CS play. Here’s what’s actually worth your coins.
S-Tier CS Weapons (September 2026)
| Weapon | Type | Best For | Key Strength |
|---|---|---|---|
| MP40 | SMG | Close-range rush | Fastest TTK under 15m. OB54 buffed accuracy and armor pen. The CS staple. |
| Groza | AR | Mid-range dominance | 61 damage, low recoil, S-tier accuracy. Best AR in the game, but expensive in CS shop. |
| M1887 | Shotgun | Building pushes, 1v2 clutches | 100 damage per shot. Two shots, two kills. OB54 made it cheaper in CS. |
| AWM | Sniper | Opening picks | One headshot kills through any helmet. Period. New Sniper Stabilizer attachment in OB54 improves prone accuracy. |
| UMP | SMG | Versatile mid-range | More control than MP40, strong armor penetration. Best SMG for players who want range flexibility. |
| M82B | Sniper | Anti-Gloo Wall | Shoots through Gloo Walls. Combined with Flame Grenade, this completely shuts down wall-dependent players. |
| Woodpecker | DMR | Consistent mid-long poke | More forgiving than AWM. OB54 price drop in CS makes it accessible by Round 3. |
Best CS Weapon Combos
MP40 + Groza: the dominant 2026 combo for aggressive players. Groza handles mid-range; MP40 takes over the instant a fight collapses into close range.
AWM + MP40: the classic sniper-rush loadout. AWM picks off targets at distance, then swap to MP40 when enemies close the gap. Requires strong weapon-switching discipline.
UMP + Woodpecker: the stable armor-breaking setup. Both weapons have strong penetration. Best for anchors who hold positions rather than rush.
M82B + MP40: the anti-Gloo Wall loadout. M82B punishes defensive players; MP40 handles the push once their cover is gone. With the Flame Grenade in OB55, this combo becomes even more oppressive against wall-dependent teams.
Avoid in CS
The AK47 and M4A1 have dropped to C-tier in the current meta. They’re usable but consistently outclassed by Groza and SCAR. The Vector Akimbo is a trap: it shreds under 5 meters but its range drops so sharply that any fight beyond that distance is a guaranteed loss. Don’t buy it unless the entire map is tight corridors.
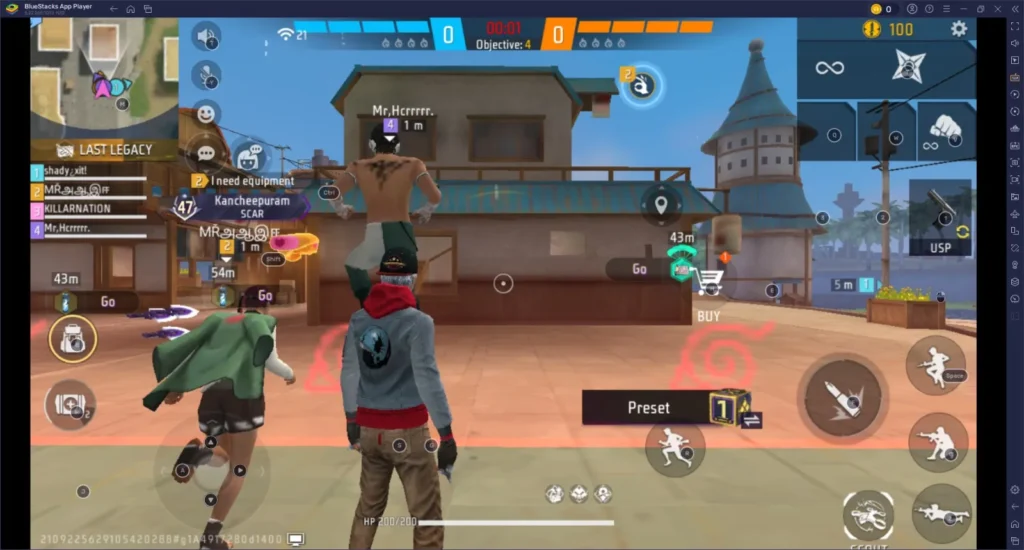
Best Character Combos for Clash Squad
CS fights last 2-3 seconds. You need burst abilities that win the opening exchange, not passive healing that kicks in after a 5-second fight you already lost. One active skill slot plus three passive slots. You can compare every ability on our Free Fire characters page.
The Aggressive Rusher
Best for: Diamond to Heroic push • Solo queue carry • MP40/M1887 users
Active: Alok (Drop the Beat). 5-second heal aura + 15% movement speed. Activate just before pushing a corner. Harder to track while moving fast, and the heal offsets opening damage you take as entry.
Passive: Kelly (Agility). +6% sprint speed. Reach cover faster than enemies can track.
Passive: Jota (Sustained Raids). Every enemy knock restores 40 HP. Two knocks in a round and you’re nearly full HP before the third fight.
Passive: Hayato (Bushido). Armor penetration increases as HP drops. If you get low mid-push, your shots hit harder. Keeps you dangerous in 1v1 clutches.
How to play it: Activate Alok before crossing open ground. Rush with MP40 for the first knock. Jota tops you back up. If you take heavy damage, Hayato’s passive means your low-HP shots punch through armor. Don’t activate Alok while already in cover: save it for the moment you step into a fight.
The Defensive Anchor
Best for: All ranks • Holding angles • AWM/Woodpecker users
Active: Chrono (Time Turner). Deploys a shield that blocks up to 600 damage. Pop it when caught in the open or when you need 4 seconds to reload without dying. OB54 buffed Chrono: he’s back in the meta.
Passive: Rafael (Dead Silent). Shots are silenced when scoped. Enemies can’t hear your fire direction.
Passive: Laura (Sharp Shooter). Accuracy increases when scoped. Direct synergy with Rafael.
Passive: Maro (Falcon Fever). Damage scales with distance. Every hit at 30+ meters does bonus damage.
How to play it: Hold the longest sightline on the map. Fire. When they rush your position, pop Chrono shield, reposition behind it while Rafael silences your shots. This works even at Heroic where enemies actively listen for shot directions.
The Revive Engine (Squads Only)
Best for: Coordinated squads • Turning 3v4 back into 4v4
Active: Dimitri (Healing Heartbeat). Creates a healing zone. Knocked teammates can self-revive inside it.
Passive: Thiva (Vital Vibes). Revive speed +70%. Revived player gets extra HP.
Passive: Jota (Sustained Raids). Keeps you alive while you secure knocks to create revive windows.
Passive: Kelly (Agility). Sprint speed to reach knocked teammates fast.
How to play it: When a teammate goes down, activate Dimitri, drop a gloo wall around the knocked player, and let them self-revive inside the zone. Thiva’s passive means they come back with more HP than a standard revive. One knock negated per round if timed correctly.
The OB55 Kenta Build (New)
Best for: Anti-Gloo Wall aggression • Mid-range control • Experimental
Active: Kenta (Tempest). Fires a tempest that passes through Gloo Walls (25 damage), then teleport to it for 20% damage reduction shield. 45s cooldown.
Passive: D-Bee. Movement accuracy and speed bonus while firing. Helps maintain accuracy during the teleport-and-shoot sequence.
Passive: Jota (Sustained Raids). HP recovery on knocks.
Passive: Iris (Wall Brawl). Shoot through Gloo Walls with 10% extra damage. Combined with Kenta’s tempest, gloo walls become meaningless.
How to play it: This is the anti-wall build. Fire tempest through enemy gloo wall, follow up with regular shots (Iris lets them penetrate), then teleport forward for the aggressive close. Pair this with the M82B for maximum wall-destroying potential. This build is untested in ranked meta: use it once you’re comfortable and have coins to spare.
Skill Boost System (OB54+)
Eight characters now have a Skill Boost system in CS: Alok, Koda, Homer, Chrono, Kassie, Skyler, Wukong, and Oscar. During later rounds, you can select an upgrade for your active skill: each character has two boost options, but you pick only one. Every other active-skill character gets a flat 15% cooldown reduction instead. If you’re running Alok or Chrono, your late-game rounds are now stronger than they used to be.
Best Clash Squad Sensitivity Settings
CS has shorter engagement distances and faster reaction windows than BR, which means your sensitivity needs are different. Want values tuned to your own phone? Use our Free Fire sensitivity generator, and see our one tap headshot settings guide for drag-shot setups.
0-100 Scale (Classic)
- General: 96
- Red Dot: 94
- 2x Scope: 88
- 4x Scope: 78
- Sniper Scope: 45
- Free Look: 85
0-200 Scale (OB54+)
- General: 185
- Red Dot: 175
- 2x Scope: 160
- 4x Scope: 140
- Sniper Scope: 90
- Free Look: 120
Why these numbers for CS specifically: General and Red Dot are higher than typical BR settings because CS fights happen at closer range, requiring faster horizontal tracking. Sniper Scope is kept low because over-flicking a headshot on a stationary peek is the most common AWM miss in CS. Scope values (2x, 4x) are moderate because you rarely scope at long range in CS: most fights happen within Red Dot distance.
How to calibrate for your device: Play three Clash Squad matches. If your crosshair consistently stops below the enemy’s head, increase General by 5. If your aim flies above, decrease by 5. Don’t change more than one slider at a time. Give yourself at least 5 matches before adjusting again: your muscle memory needs time to adapt. A 15-minute Training Island routine (5 min tracking targets, 5 min drag headshots, 5 min weapon switching) before ranked sessions makes a noticeable difference within a week.
90Hz/120Hz device users: Higher refresh rates make the screen more responsive, so slightly lower values (10-15 points below the numbers above) can give you better control without sacrificing speed. If you use gyroscope for fine-aiming, lower all values by 10-15 points: the gyro handles micro-adjustments while your thumbs handle macro-movement.
Fire button size: Set it between 47-51 (higher on newer phones) and position it slightly below the kill count. This allows a natural upward drag motion for headshots without reaching across the screen.
Clash Squad Map Control Tips (Bermuda, Kalahari, Alpine and More)
Clash Squad rotates across multiple maps, but Bermuda, Kalahari, and Alpine are where the majority of ranked matches happen. Each has a specific control point that determines who wins the most rounds.
Bermuda: Clock Tower
Rooftop positions are the most contested real estate on this map. The team holding high ground controls sightlines to three approach routes simultaneously. If your team has a sniper, reaching the Clock Tower roof in the first 10 seconds of the round is worth the sprint. If the enemy controls it first, use smoke to push the stairs rather than trying to peek from ground level.
Kalahari: Mid-Map Compound
The central compound is the chokepoint that forces enemies into one of two approach angles. Hold it with your anchor, send the rusher to the left flank, and use gloo walls to control the right side. Teams that try to fight Kalahari from the edges usually lose on zone. OB55 cleaned up some terrain details on Kalahari to improve targeting and cover behavior.
Factory / Shipyard
The middle container yard is a death trap: both teams have sightlines into it from railing positions above. Never walk through the middle in Rounds 1-4. Always take the metal stairs on the far edges to reach second-floor railing. From there you control vertical angles the enemy can’t peek without exposing themselves. Pre-cook grenades for stairwell pushes: a cooked grenade down the stairs buys you 5 seconds to reposition.
Alpine
Elevation changes make this map sniper-friendly. The high-ground rock formations near the spawn give an AWM player a commanding position for 2-3 rounds before enemies adapt. Once they do, rotate to the lower flanking path and use the terrain dips as natural cover. The team that controls elevation transitions, not just the highest point, wins Alpine consistently.
Pochinok
The concrete house with tires in the back quadrant is the highest-value control point. Use the tires to jump onto the roof. Enemies almost never look up, and you get clear sightlines on every doorway and window below. Your rusher goes rooftop, anchor holds the garage, sniper watches the open lane. If the enemy takes the roof first, don’t contest from below: use a flashbang to blind, then push during the disorientation window.
Gloo Wall Tips (and Why Flame Grenades Change Everything)
Most players below Heroic use gloo walls in exactly one situation: when they’re already dying and need 2 seconds. That’s reactive. Proactive gloo wall use wins rounds before the first shot is fired.
Four Jobs a Gloo Wall Should Do
Every wall you place should accomplish at least one of these: break line of sight to stop a spray, buy reset time for healing or reloading, create a forced angle to make the enemy reposition, or build a route connecting natural cover across an exposed area. If your wall doesn’t do one of these things, you wasted 200 coins.
When to Place: Not When You’re Dying
Before a push: Place one wall at the corner you’re about to cross. If an enemy peeks while you’re mid-movement, the wall absorbs the shot instead of you.
During a reload: Never stand still in the open while reloading. Place a wall behind you to cover the angle you just turned away from.
As bait: Drop a wall in an open lane and reposition to the side. Enemies shoot the wall expecting you behind it. You’re already flanking from a different angle.
For revives: When a teammate goes down in the open, don’t rush the revive without cover. Build the wall first, then start the revive from a protected angle. If using Dimitri’s Healing Heartbeat, the gloo wall protects the self-revive zone.
The Flame Grenade Changes the Gloo Meta
Before OB55, the biggest counter to gloo walls was the M82B (shoots through walls) or Skyler’s active ability (damages nearby walls). Now, a single Flame Grenade destroys a gloo wall in under a second: 100 damage per 0.5 seconds means a 600 HP gloo wall melts in 3 seconds while also burning anyone standing behind it.
Meta Shift
Gloo walls are no longer a safe 5-second bunker. They’re now a 1-2 second tool that buys you a moment to reposition, not to camp behind. If you hear a Flame Grenade land near your wall, move immediately. Don’t wait for the wall to break. The burn area lasts 6 seconds and expands, so standing still behind a melting wall means you take both the fire damage and the follow-up shots once the wall drops. Place walls, get your peek or reload, and then abandon the position before the enemy throws the flame.
Gloo wall budget per round: Minimum 2 walls per round, always. In Rounds 5-7 when coin pools are bigger, carry 3-4 walls. A wall costs 200 coins: running out of walls in a final-round fight is an economy mistake, not a tactical one.
Clash Squad Solo Queue Tips: How to Carry Randoms
If you’re solo queuing CS ranked, you already know the experience: four players all rushing independently, nobody buying utility, someone goes AFK by Round 3. You can’t control them. But you can play around them.
Play the Anchor Role
Don’t try to be the hero rusher when your teammates are unpredictable. Play Anchor. Hold angles, call enemy positions in text chat or quick pings, and avoid solo pushes. Let the randoms create chaos in the front: you clean up the 1v1s they create. When they rush and trade one kill for one death, you’re the player alive with full HP and information about where the remaining enemies are.
Don’t Engage Every Fight
Solo queue is about surviving to the last 2v2, not getting the opening kill. Play for information: use a Sonar Grenade if you have one, peek and callout enemy positions, let your random teammates make the first contact. Your job is to be alive when the round is 2v2 or 1v2, because at that point your positioning and aim advantage over the remaining enemies is at its highest.
Clutch Tips: 1v2 and 1v3 Decision Trees
Clutch rounds are where ranks are actually decided. Here’s the decision framework.
1v2: You Can Win This
Step 1: Don’t peek both at once. If two enemies are together, bait one peek with a gloo wall or sound (weapon switch sound, footstep direction) and engage the one who pushes first. Make it two separate 1v1s, not one 1v2.
Step 2: Use terrain to create separation. Move to a position where a wall or building corner forces them to approach one at a time. If they split to flank you from both sides, you’re in trouble: address the closer one immediately, then reposition before the second arrives.
Step 3: Heal between kills. After the first knock, don’t rush the second enemy. Place a gloo wall, use your medkit or character heal (Alok’s aura, Jota’s passive after a knock), and then engage the second enemy from a stronger position.
1v3: You Probably Can’t, But Here’s How
The only realistic path: Create a chain of 1v1s. Never take a fight where more than one enemy has line of sight on you. Use audio cues (footsteps, reloads) to track positions and pick off the isolated player first. After each knock, reposition entirely: the remaining enemies now know where you were, so you need to be somewhere else when they arrive.
When to save versus attempt: If you’re up 3-1 in rounds, take the clutch attempt, even a loss doesn’t hurt much. If you’re down 1-3, play for information and try to trade at least one kill to damage their economy. At 3-3 (match point), play slow. The team that panics at 3-3 loses.
Best Clash Squad Settings for Low-End Phones
A lot of Indian CS ranked players are on 3-4GB RAM phones with mid-range chipsets. Frame drops in a 1v1 fight are the difference between a headshot and a death. Here’s the settings baseline that prioritizes performance over visuals.
- Graphics: Smooth (lowest)
- High FPS: High or Ultra (whatever your device can sustain)
- Shadows: OFF
- High Resolution: OFF
- Aim Precision: Precise on Scope
- Auto-pickup: OFF (it grabs items you don’t want and wastes frames)
- Close background apps before every ranked session. Free up RAM so the game gets priority.
- Use headphones: footstep audio direction is critical in CS where the map is small and every sound reveals a position.
If you’re on a 90Hz or 120Hz display, make sure your FPS setting is set to match. Playing at 60 FPS on a 120Hz screen wastes your hardware advantage. The smoother framerate directly improves your drag-headshot consistency because the visual feedback is faster.
Clash Squad Mistakes That Keep You Stuck at Diamond
Fixing these will help your Clash Squad rank, and our how to push rank in Free Fire guide covers the ranked points system across modes.
✕ Peeking the same angle twice
If you miss a peek and pull back, the enemy now knows exactly where you are. They’re pre-aiming that exact pixel. Reposition 2-3 steps sideways before peeking again. Even a small lateral shift changes your angle enough to throw off their crosshair placement.
✕ Rushing without information
“Information” means knowing where at least one enemy is before you push. Your sniper should body-shot someone before your rusher moves. One 150-damage hit means you’re pushing a half-health enemy: that’s an entirely different fight from pushing someone at full HP. In OB55, the Sonar Grenade gives you this info for 200 coins.
✕ Buying the G18 in Round 1
The G18 costs 300 coins and is worse than the free Double USP you already have. You are spending 300 coins to downgrade your pistol. Spend those 300 coins on a gloo wall and flashbang instead.
✕ Saving coins when you’re 0-3
When you’re down 0-3, the loss streak bonus equalizes your buying power. You can full-buy in Round 4 and be on roughly equal gear terms. A lot of players eco themselves into an 0-4 loss when a Round 4 full-buy would have turned the match around. If you’re losing, the comeback round is Round 4: buy everything and fight.
✕ Playing aggressively at 3-3
A tied 3-3 scoreline means neither team has momentum. The team that survives the decider by playing patient and forcing the other team into a mistake usually wins. Don’t be the player who rushes mid-map at match point and dies in the first 5 seconds: you just gave your team a 3v4 in the most important round of the game.
✕ Using BR characters in CS
Characters like Ford are excellent in Battle Royale but their skills take too long to activate or provide too little burst value in CS’s 3-second fights. Before a ranked session, verify your character combo is CS-optimized using the builds in the character combos section above.
✕ Ignoring the Excellent Badge (OB55)
The new Excellent Badge system rewards clean play: 40 consecutive matches without reports or abuse earns you a 10% Rank Protection in Clash Squad. That means one loss every ten games effectively costs you less. Play consistently, don’t rage-quit, don’t flame randoms: the badge literally protects your rank points.
For official patch notes and announcements, visit the official Garena Free Fire website.
FAQs: Free Fire Clash Squad Tips and Tricks
What is the best character for CS Rank in Free Fire?
Alok remains the most reliable active skill in CS Rank: Drop the Beat provides both healing and speed, useful in every round regardless of map or playstyle. Chrono is a strong alternative for defensive players, and the reworked Kenta (OB55) is emerging as a meta option for players who want anti-Gloo Wall pressure.
How many gloo walls should I buy per round in Clash Squad?
Minimum 2 per round. In Rounds 5-7 when coin pools are larger, 3-4 walls is standard. A wall costs 200 coins: running dry on walls in a final-round fight is an economics mistake more than a tactical one. In OB55, also budget for Flame and Sonar grenades alongside walls.
How do I win Clash Squad with random teammates?
Play the Anchor role. Hold angles, call enemy positions in text chat or voice, and avoid solo pushes. Let randoms create chaos in the front while you clean up the 1v1s they create. Drop weapons for broke teammates in Rounds 2 and 3: a team where everyone has a real weapon beats a team where three are rich and one runs a pistol.
What is the best weapon combo for Clash Squad?
MP40 + Groza is the dominant aggressive combo. AWM + MP40 for sniper-rush players. UMP + Woodpecker for stable armor-breaking anchors. M82B + MP40 for anti-Gloo Wall pressure. The weapon meta in OB55 favors speed and armor penetration.
When should I eco round versus force buy in Clash Squad?
Eco when you lost the previous round and have under 1,000 coins: buy a Desert Eagle and one utility item, play passive, try to steal an enemy weapon on a headshot. Force buy when you won the previous round and have 1,500+ coins. Never eco after two consecutive losses; the loss streak bonus gives you enough to full-buy, and an 0-4 deficit from repeated eco rounds is nearly impossible to come back from.
What sensitivity should I use for Clash Squad?
For the 0-100 scale: General 96, Red Dot 94, 2x Scope 88, 4x Scope 78, Sniper 45, Free Look 85. For the 0-200 scale: General 185, Red Dot 175, 2x 160, 4x 140, Sniper 90, Free Look 120. CS needs slightly higher General and Red Dot than BR because engagements are closer. Adjust by 5 points at a time based on whether your crosshair undershoots or overshoots heads.
What changed in Clash Squad with the OB55 update?
OB55 (September 16, 2026) added Flame Grenades (burns for 6 seconds, melts gloo walls), Sonar Grenades (reveals enemies within 10m for 3 seconds), reworked Kenta (tempest passes through gloo walls + teleport), Luna and Morse nerfs, Wukong buff, and the Excellent Badge (10% rank protection after 40 clean matches).
Is Clash Squad rank harder than Battle Royale rank in Free Fire?
CS rank tests a different skill set. BR rewards survival, positioning, and zone management: you can rank up with zero kills by placing top 3 consistently. CS requires aim consistency, economy management, and team coordination every single round.
Have a question we didn’t cover? Browse more answers on our Free Fire questions page.