
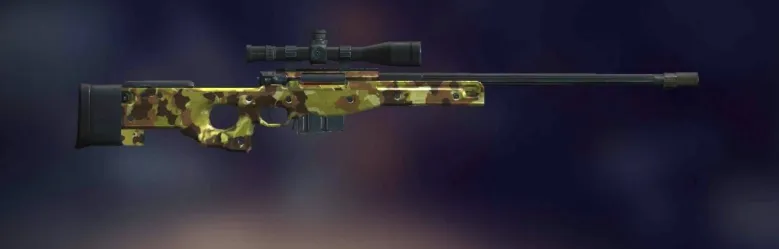
AWM Gun in Free Fire — Damage, Stats, Best Attachments Overview
The AWM is the most feared weapon in Free Fire. One headshot. One kill. Through any helmet. No exceptions.
With 90 base damage and a 2.5x headshot multiplier, a single AWM headshot delivers 225 damage — enough to instantly eliminate any player regardless of their helmet level, health, or EP shield. No other weapon in the game can do this. Even body shots deal 90 damage, meaning just two body shots will down most enemies. The AWM has been the undisputed best sniper rifle since Free Fire launched, and it remains S-Tier in the 2026 meta.
But the AWM is also one of the hardest weapons to master. It fires bolt-action — meaning after every shot, there’s a long chambering animation before you can fire again. The magazine holds only 5 rounds. The reload speed is the slowest in the game at 34. And it’s only available from airdrops, so you can’t plan your loadout around it — you have to earn it by contesting the drop.
The AWM uses Sniper Ammo (a dedicated ammo type, not shared with ARs or SMGs) and comes pre-equipped with an 8x scope — the maximum zoom level in Free Fire. It accepts three attachment types: Muzzle, Magazine, and Scope.
AWM Stats Breakdown
Every stat on the AWM is designed around one purpose: ending fights with a single bullet.
Damage: 90 — The highest per-shot damage of any ranged weapon in Free Fire (only the M1887 shotgun and Crossbow deal more, but at close range). Combined with the 2.5x headshot multiplier, a headshot delivers 225 damage. Even against a Level 3 helmet (which reduces headshot damage by 40%), you still deal roughly 135 damage — a guaranteed one-shot kill against any player at full HP.
Rate of Fire: 27 — The slowest in the entire game. After every shot, the AWM cycles through a bolt-action animation. This is the weapon’s biggest drawback. If you miss your shot, you’re completely exposed for over 1 second before you can fire again. This is why the quickswap technique (switching to a secondary weapon immediately after firing) is essential.
Range: 91 — The highest range stat of any weapon. The AWM maintains full damage at extreme distances where other weapons have already lost most of their effectiveness. Combined with the pre-equipped 8x scope, you can engage enemies from across the map.
Accuracy: 90 — The highest accuracy in the game, tied with the Kar98k. Your bullet goes exactly where your crosshair is pointing. At these numbers, missed shots are a player error, not a weapon limitation.
Reload Speed: 34 — Painfully slow. A full reload takes roughly 3 seconds — an eternity in Free Fire combat. This is why Extended Magazine and the quickswap technique are critical. You never want to be caught reloading an AWM in the open.
Magazine: 5 rounds — The smallest magazine of any primary weapon. Every bullet matters. A single miss costs you 20% of your available ammo. This makes Extended Magazine one of the most impactful attachments for the AWM.
Movement Speed: 55 — Noticeably slower than ARs (62) and SMGs (65). Carrying the AWM makes you less mobile, which is fine when you’re sniping from a position but dangerous when rotating. Swap to your secondary weapon when moving across the map.
Armor Penetration: 0 — The AWM has no base armor penetration. Against body armor, this means your body shots deal reduced damage. However, with 90 base damage, even reduced body shots still deal significant damage (two body shots kill through most vests). And headshots bypass armor calculations entirely at this damage level.
Best Attachments for AWM
The AWM accepts 3 attachment types: Muzzle, Magazine, and Scope. No Foregrip, no Stock. Here’s the priority build:
1. Muzzle — Suppressor (Top Priority)
The Suppressor is the best muzzle attachment for AWM — and it’s not close. Since AWM already one-shots on headshots, you don’t need a Compensator for damage. What you need is stealth. A suppressed AWM doesn’t reveal your position with a loud gunshot crack, doesn’t show a muzzle flash, and doesn’t appear on the enemy’s minimap. After you fire and eliminate someone, their teammates have no idea where you’re shooting from. This lets you take a second shot before they can react.
Alternative: If you can’t find a Suppressor, a Compensator improves accuracy and recoil recovery for faster follow-up shots. But Suppressor is always the priority.
2. Magazine — Extended Mag (Level 2 or 3)
The AWM’s 5-round magazine is brutally small. Missing one shot costs you 20% of your ammo. An Extended Magazine bumps this to 7-8 rounds, giving you critical extra shots before a 3-second reload. In a squad fight where you’re sniping multiple targets, those extra rounds are the difference between clearing the team and getting stuck reloading.
3. Scope — Keep the 8x (Default)
The AWM comes with a pre-equipped 8x scope — the maximum zoom in Free Fire. You generally don’t need to change this. The 8x is already optimized for the AWM’s engagement range. Focus your attachment priority on Muzzle and Magazine instead.
If you play a quickscope/aggressive sniper style in Clash Squad, some players swap to a 4x for faster scope-in speed at mid-range. But for standard ranked Battle Royale, the 8x stays.
Best Character Pairings
Character abilities can dramatically amplify the AWM’s already-devastating power:
Maro (Falcon Fervor) — The #1 character for AWM users. Maro’s passive increases damage based on distance to the target — up to 25% bonus damage at max range. Since AWM is designed for long-range engagement, Maro directly amplifies its biggest strength. He also deals 3.5% bonus damage to marked enemies (paired with Moco for marking). A Maro + AWM at long range delivers damage numbers that nothing else in the game can match.
Rafael (Dead Silent) — Automatically silences Sniper Rifles and Marksman Rifles when fired. This means you get the Suppressor effect even without a Suppressor attachment (freeing the Muzzle slot for a Compensator). Rafael also forces enemies you knock down to bleed out 85% faster — a devastating advantage in squad fights where teammates can’t revive in time.
Laura (Sharp Shooter) — Increases weapon accuracy by up to 35% while scoped in. The AWM already has 90 accuracy, but Laura pushes it even higher for those pixel-perfect headshots at extreme range. The best pick for players who prioritize pure aim precision.
Moco (Hacker’s Eye) — Tags enemies you shoot for up to 5 seconds, sharing their location with your team. Even if your first AWM shot doesn’t kill (a body shot against a full-HP target), Moco’s tag reveals their position so your team can follow up or you can track them for a second shot.
Clu (Tracing Steps) — Reveals the positions of enemies within a 75-meter radius who are standing or crouching. This gives you advance knowledge of where targets are before you scope in — critical for a weapon where every shot counts.
AWM vs Other Snipers
AWM vs M82B: The two S-Tier snipers, built for different situations. AWM has higher raw damage (90 vs 91 on paper, but AWM has better accuracy at 90 vs 54), and the guaranteed one-shot headshot makes it the pure aim-skill sniper. M82B’s unique advantage is penetrating Gloo Walls and dealing bonus vehicle damage — in Diamond+ lobbies where every squad carries 3-4 Gloo Walls, this utility can outweigh AWM’s higher accuracy. Competitive consensus: AWM for open terrain headshot fights, M82B for ranked lobbies where Gloo Walls dictate positioning. Both are S-Tier.
AWM vs Kar98k: On paper they look identical — same 90 damage, same 5-round magazine, same fire rate. The difference is range (AWM 91 vs Kar98k 84) and availability (AWM is airdrop-only, Kar98k is ground loot). The AWM maintains full damage at longer distances and has the higher bullet velocity. Kar98k is the “budget AWM” — strong as ground loot, but always swap to AWM when you find one.
AWM vs Woodpecker: The Woodpecker is a marksman rifle, not a sniper — it fires semi-auto with 85 damage and 75 armor penetration. The Woodpecker is more forgiving (faster fire rate, more shots) and shreds armor. But it can’t one-shot headshot through Level 3 helmets. If your aim is consistent, AWM is deadlier. If you miss shots often, Woodpecker is more forgiving.
Best AWM Skins
Legendary Beast (Evo Skin) — The only AWM Evo skin. Dragon beast-themed with dramatic transformation animations across 7 levels. At max level, it boosts damage and range with a Level 6 passive that adds bonus headshot damage — making the already-lethal AWM headshot even more overkill. The tradeoff is reduced reload speed (which you mitigate with Extended Mag). This is the ultimate AWM skin for dedicated snipers.
Frostfire — The most coveted non-Evo AWM skin. Ice-themed with yellow-blue fireball effects. Increases reload speed and magazine capacity with a minor accuracy reduction — the accuracy trade is negligible since AWM already sits at 90. The reload speed buff directly addresses the AWM’s slowest stat, making this arguably the best combat skin for practical gameplay.
Tagger’s Revolt — Graffiti-themed skin that boosts reload speed and magazine size. Similar practical benefits to Frostfire with a street-art aesthetic.
Playboy — Orange and white colorway that increases fire rate. Helpful in Clash Squad where follow-up shots matter more than in BR. The tradeoff is smaller magazine — risky in Battle Royale but viable in short Clash Squad rounds.
Metal Wings — Assassin’s Creed collaboration skin with a white-red wing design. Boosts damage and rate of fire for a deadlier overall profile.
How to Use AWM — Advanced Tips
The Quickswap Technique
This is the single most important AWM technique. After firing a shot, immediately switch to your secondary weapon instead of waiting for the bolt-action animation. This lets you either finish the enemy with your secondary (if the first shot was a body shot) or defend yourself if an enemy rushes you. The bolt-action cycle leaves you completely defenseless for over 1 second — quickswapping eliminates that vulnerability. Practice until it’s muscle memory: scope, fire, instantly tap the weapon switch button.
Always Shoot From High Ground
The AWM’s 8x scope gives you massive range advantage, but only if you have clear sightlines. Before scoping in, position yourself on rooftops, hillcrests, or elevated terrain. High ground gives better shooting angles, makes you harder to push, and lets you see enemies before they see you.
Pre-Aim Head Level
Before scoping in on a target, position your crosshair at the height where heads will be. This minimizes the adjustment needed when you ADS (aim down sight). Against stationary targets, pre-aiming means the headshot is almost free. Against moving targets, you only need to lead horizontally — your vertical aim is already correct.
Use Sniping Sensitivity Settings
The AWM has its own dedicated sensitivity slot in Free Fire’s settings (separate from Red Dot, 2x, and 4x). Set it lower than your other sensitivities — between 15-30 depending on your device and preference. A lower sniper sensitivity prevents your scope from overshooting when you make small adjustments. The 8x zoom magnifies every movement, so lower sensitivity gives you precise control.
Don’t Fight Close-Range With AWM
The moment an enemy gets within 20 meters, swap to your secondary weapon. The AWM’s bolt-action fire rate, scope zoom, and movement speed penalty make it a liability at close range. Have an MP40, UMP, or shotgun ready for CQB situations. The AWM’s job is to delete enemies before they get close — not to duel them point-blank.
Take the Element of Surprise
With a Suppressor equipped, your first shot is invisible on the minimap. Use this. Shoot from unexpected angles, relocate after 2-3 shots (even suppressed shots can be traced by sound), and never snipe from the same position twice. The AWM with a Suppressor + Maro at max range is the most undetectable lethal combination in Free Fire.
Best Weapon Pairings
The AWM covers 50+ meters. Your secondary covers everything closer.
AWM + MP40 — The classic sniper-rush loadout. AWM picks off targets at distance, then swap to MP40 when enemies close the gap. MP40’s insane fire rate covers the AWM’s close-range weakness perfectly.
AWM + UMP — More versatile than AWM + MP40. The UMP’s armor penetration and 37 range cover 0-25 meters with armor-shredding capability, while the AWM handles everything beyond. The best combo for ranked BR where enemies are always armored.
AWM + Groza — Two airdrop weapons. If you find both, you have the most powerful loadout possible — Groza dominates close-to-mid range, AWM dominates long range. The downside: both are airdrop-only, so this combo is rare.
AWM + SCAR — The practical combo. SCAR is everywhere as ground loot and covers mid-range reliably. Pair with AWM for a loadout that works from the moment you loot until the final circle.
When to Use — and When to Replace — the AWM
Always pick up the AWM when: You find one in an airdrop. There is no situation where you should leave an AWM behind. It’s the most powerful weapon in the game, period.
Consider swapping to M82B when: You’re in a lobby where Gloo Wall spam is constant (Diamond+). The M82B’s ability to penetrate Gloo Walls provides utility the AWM cannot match.
Never replace the AWM with: A Kar98k (AWM is a strict upgrade in every stat). Any DMR (Woodpecker, SKS, SVD) — DMRs are more forgiving but lack the one-shot headshot potential.
Always carry a close-range secondary: The AWM without a close-range backup is a death sentence in final circles. MP40, UMP, M1887, or even a SCAR — always have something for under 25 meters.
AWM Trivia
The AWM in Free Fire is based on the real-world Arctic Warfare Magnum, manufactured by Accuracy International. The military designation is L115A3, and it’s chambered in .338 Lapua Magnum — a cartridge specifically designed for extreme long-range precision shooting. The real AWM holds the record for one of the longest confirmed sniper kills in military history — British Army Corporal Craig Harrison achieved a kill at 2,475 meters (1.54 miles) in Afghanistan in 2009 using the L115A3.
In Free Fire, the AWM has been S-Tier since day one and has never left the top tier in any meta update. It was the weapon used in the most iconic competitive Free Fire moments — including numerous tournament-winning final-circle eliminations. The AWM Legendary Beast Evo skin is among the most expensive Evo skins in the game, requiring approximately 10,000-14,000 diamonds to fully upgrade from Level 1 to Level 7.
Frequently Asked Questions
What is AWM damage in Free Fire?
AWM deals 90 base damage per bullet. With a 2.5x headshot multiplier, a headshot delivers 225 damage — enough to one-shot any player through any helmet, including Level 3.
Is AWM the best gun in Free Fire?
AWM is the best sniper in Free Fire and one of the best overall weapons. It’s the only weapon that guarantees a one-shot headshot kill through any armor. It’s rated S-Tier in every 2026 tier list.
Where to find AWM in Free Fire?
AWM is only available from Airdrops. It cannot be found as ground loot. Contest every airdrop you can reach — the AWM is worth the risk.
AWM or M82B — which is better?
AWM has higher accuracy (90 vs 54) and a guaranteed one-shot headshot. M82B can penetrate Gloo Walls. Use AWM on open terrain, M82B in Gloo Wall-heavy ranked lobbies. Both are S-Tier.
What are the best attachments for AWM?
Suppressor (muzzle) → Extended Magazine → Keep the 8x Scope. The Suppressor hides your position; the Extended Mag gives you 7-8 rounds instead of 5.
Which character is best with AWM?
Maro is the #1 pick — his passive increases damage with distance, amplifying AWM’s long-range power by up to 25%. Rafael adds silent shots. Laura increases scoped accuracy.
What is AWM headshot damage?
225 damage (90 base × 2.5x headshot multiplier). Even against a Level 3 helmet (40% reduction), the effective damage is ~135 — still a guaranteed one-shot kill against any player at 200 HP.