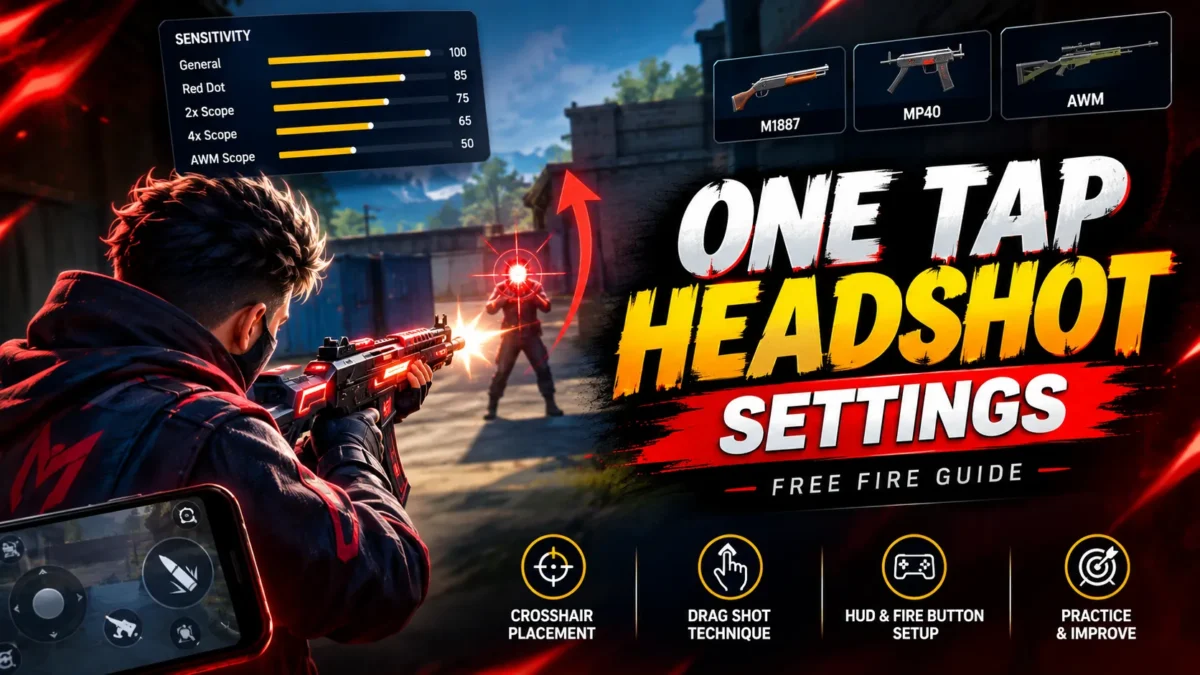
Looking for the best one tap headshot settings Free Fire players actually use in 2026? Landing a one-tap headshot is the fastest way to eliminate enemies in Free Fire. One clean shot to the head and the fight is over. But hitting headshots consistently is not about luck — it depends on your sensitivity settings, drag technique, crosshair placement, weapon choice, and practice. In this guide, we break down everything you need to know to start hitting one-tap headshots in Free Fire, whether you play on a budget phone or a flagship device.
Landing a one-tap headshot is the fastest way to eliminate enemies in Free Fire. One clean shot to the head and the fight is over. But hitting headshots consistently is not about luck — it depends on your sensitivity settings, drag technique, crosshair placement, weapon choice, and practice. In this guide, we break down everything you need to know to start hitting one-tap headshots in Free Fire, whether you play on a budget phone or a flagship device.
What is a One-Tap Headshot?
A one-tap headshot means killing an enemy with a single shot (or a single burst) directly to the head. In Free Fire, headshots deal extra damage — usually 2x the base damage of the weapon. So a gun that does 100 body damage will do 200 damage on a headshot. That is enough to kill a full-health player instantly, even with a helmet. The “one-tap” part refers to the technique where you tap the fire button and drag your aim upward to the head in one smooth motion.
Best Sensitivity Settings for One-Tap Headshots
Your sensitivity controls how fast your crosshair moves when you swipe the screen. For one-tap headshots, you need your crosshair to move upward quickly during a drag shot. But if your sensitivity is too high for your phone, your aim will shake and overshoot the head. The right sensitivity depends on your device.
Low-End Devices (2-3 GB RAM)
If you play on a budget phone like Redmi 9A, Realme C11, Infinix Smart, or any phone with 2-3 GB RAM — do not use maximum sensitivity. Your phone has slower touch response and lower FPS, so high sensitivity will make your aim shake badly. Use these stable values instead:
| Setting | Value |
|---|---|
| General | 80-90 |
| Red Dot | 75-85 |
| 2x Scope | 70-80 |
| 4x Scope | 60-70 |
| AWM / Sniper | 40-50 |
| Free Look | 60-70 |
On a low-end phone, controlled sensitivity gives you more headshots than max sensitivity. A smooth, short drag works better than a fast, shaky flick.
Mid-Range Devices (4-6 GB RAM)
If you play on phones like Redmi Note series, Realme Narzo, Samsung Galaxy A series, Poco M series, or any phone with 4-6 GB RAM — you can push the sensitivity higher. These phones handle faster touch input without too much lag.
| Setting | Value |
|---|---|
| General | 90-95 |
| Red Dot | 85-95 |
| 2x Scope | 80-90 |
| 4x Scope | 70-80 |
| AWM / Sniper | 50-60 |
| Free Look | 70-80 |
High-End Devices (6+ GB RAM, 90Hz/120Hz)
If you play on phones like iPhone 13 or newer, OnePlus, Samsung S series, Poco F series, iQOO, or any phone with 6+ GB RAM and high refresh rate — you can go near-max sensitivity. Your phone’s touch sampling and frame rate can handle it.
| Setting | Value |
|---|---|
| General | 95-100 |
| Red Dot | 90-100 |
| 2x Scope | 85-95 |
| 4x Scope | 80-90 |
| AWM / Sniper | 50-70 |
| Free Look | 75-85 |
Why General Sensitivity Matters Most
One-tap headshots use drag shots, and drag shots are hip-fire — you don’t use a scope. That means only your General sensitivity controls how fast the crosshair moves during a one-tap drag. If you change only one setting, make it General. Keep it as high as your phone can handle without shaking.
Red Dot is the second most important. For close-range spray headshots with SMGs like MP40, you use Red Dot aim. Keep it high but slightly below General for control.
Sniper sensitivity should always stay low (40-70) because sniping needs small, precise micro-adjustments — not big flicks.
How to Apply These Settings
- Open Free Fire and tap the Settings gear icon.
- Go to the Sensitivity tab.
- Enter the values from the table that matches your phone.
- Go to Training Island and practice for 15-20 minutes.
- If the aim feels too fast, reduce each setting by 5. If too slow, increase by 5.
- Never test new sensitivity in ranked matches. Always train first.
Important: Some newer Free Fire updates use a 0-200 sensitivity scale instead of 0-100. Do not double these numbers blindly if your game shows the 0-200 scale — the feel and granularity is different. Check which scale your game version uses before applying.
Drag Shot Techniques — How to Actually Hit One-Tap Headshots
Sensitivity alone will not give you headshots. The actual skill behind one-tap headshots is the drag shot — where you tap the fire button and drag your finger upward at the same time, moving bullets from the body to the head. There are three types of drag shots, and each one works best in different situations.
1. Straight Vertical Drag
This is the most basic and most used drag technique. You aim at the enemy’s chest or shoulder level, then tap fire and drag your finger straight up on the fire button. The bullets travel from the body upward to the head.
- Best for: MP40, close to mid-range fights
- When to use: Enemy is standing still or moving toward you
- How to practice: Stand 15 meters from a Training Island dummy. Use MP40 only. Do the straight upward drag. Goal: 5 consecutive headshots using the same motion.
2. J-Drag (Rotation Drag)
This technique is for close-range shotgun one-taps, especially with the M1887. If the enemy is on your right side, start dragging the fire button to the right, then pull it upward — your finger draws a “J” shape on the screen. This helps you snap to the side first and then aim up to the head.
- Best for: M1887, close encounters, side-angle fights
- When to use: Enemy is to your left or right and you need to turn + headshot in one motion
- How to practice: Use M1887 on targets under 10 meters. Try from different angles — left side, right side, behind corners. Goal: 3 consecutive one-tap headshots from varying positions.
3. Direction Drag
This is for hitting headshots on enemies who are running sideways across your screen. You drag the fire button in the same direction the enemy is moving, while also pulling upward. This matches your aim movement with their body movement, making the headshot much more likely.
- Best for: Long-range one-taps, enemies running across open areas
- When to use: Enemy is sprinting left or right (not toward you)
- How to practice: Use Training Island moving dummies or join 1v1 custom rooms with a friend running sideways.
Drag Speed — Close vs Long Range
Your drag speed should change based on distance. This is something most guides never tell you:
- Close range (under 10m): Fast, sharp, aggressive drag. Snap the crosshair to the head instantly. Think of it like a flick.
- Long range (15m+): Gentle, slow, controlled drag. If you drag too fast at long range, your crosshair will fly above the target and miss completely.
Key point: The drag happens on the fire button, not on the screen. You press the fire button and drag it upward. You need enough empty space around the fire button for the drag to work — if other buttons are too close, your drag gets blocked.
Crosshair Placement — The Habit That Changes Everything
This is the single biggest difference between players who get headshots and players who don’t. And it has nothing to do with sensitivity or drag technique.
The rule is simple: always keep your crosshair at head level, even when you are walking around and no enemy is in sight.
Most players aim at the ground or at body level by default. Then when an enemy appears, they have to drag a long distance upward to reach the head. That takes more time, requires more skill, and has a higher chance of missing.
If your crosshair is already at head level, you only need a tiny drag — or no drag at all — to connect the headshot. The fight is won before it even starts.
Distance Adjustments for Crosshair Placement
- Close range: Place your crosshair slightly away from the enemy’s body, then drag to the head. This uses the game’s aim assist to help lock on.
- Mid range: Place your crosshair slightly near the enemy’s head, then make a small drag upward. Smaller correction needed.
- Long range: Place your crosshair directly at head height. Minimal or no drag needed — just aim and fire.
Practice this habit constantly. Every time you walk around a corner, enter a building, or rotate to a new zone — check where your crosshair is. If it’s below head level, lift it up. Within a week of doing this, your headshot rate will improve noticeably.
Best Weapons for One-Tap Headshots
Not every gun is good for one-tap headshots. You need weapons with high damage and a strong headshot multiplier. Here are the best options ranked by effectiveness:
Tier 1 — Best One-Tap Weapons
| Weapon | Type | Base Damage | Headshot Damage | Why It’s Great |
|---|---|---|---|---|
| M1887 | Shotgun | 100 | 200 (2x) | Highest burst damage in the game. One headshot = instant kill even through helmet. Close range king. |
| AWM | Sniper | 90 | Very High | One-shot headshot kill at any range. Best long-range one-tap weapon in the game. |
| Desert Eagle | Pistol | 90 | Very High | 90 damage + 90 accuracy. Only in Clash Squad mode. Feels like a sniper in pistol form. |
Tier 2 — Strong Headshot Weapons
| Weapon | Type | Why |
|---|---|---|
| Woodpecker | Marksman Rifle | Armor penetration + strong headshot damage. Best mid-range headshot weapon. |
| MP40 | SMG | Very fast fire rate gives you more bullets during a drag. Best weapon to learn drag headshots. |
| M500 | Pistol | Has a built-in 2x scope. Good for early game one-taps before you find ARs. |
| AK-47 | Assault Rifle | Highest AR damage (61 per bullet). Rewarding headshots but high recoil. |
Best Weapon Combos for One-Tap Players
- M1887 + MP40 — Maximum close-range aggression. M1887 for the one-tap, MP40 for backup spray.
- M1887 + Groza — Strongest all-range combo. Groza handles mid-range, M1887 closes fights.
- AWM + Desert Eagle — Sniper + finisher. AWM body shot + Desert Eagle follow-up = instant kill. Great for Clash Squad.
- Woodpecker + MP40 — Mid-range picks with Woodpecker, close-range drag headshots with MP40.
Weapons to Avoid for Headshots
SCAR and M4A1 have low damage per bullet — they are stable and easy to use, but not built for one-tap headshots. Heavy recoil ARs are also hard to control for headshots unless you have mastered recoil patterns. Auto shotguns like M1014 have too wide a spread for precise headshots.
HUD Layout and Fire Button Settings
Your control layout directly affects your ability to hit drag headshots. If your fire button is in the wrong position or the wrong size, the drag technique simply won’t work.
Fire Button Size and Position
- Size: Keep your fire button between 40% and 55%. Bigger makes it easier to tap, but above 55% you’ll accidentally shoot when turning around.
- Position: The fire button must have clear empty space around it. If other buttons (jump, crouch, scope) are too close, they block your upward drag movement.
- Pro tip: Some players use both fire buttons — left fire for spray and right fire for one-tap/drag shots.
2-Finger (Thumbs Only)
The default way most players hold their phone. Both thumbs do everything — movement, aiming, firing. It’s comfortable and easy to learn, but it has a low skill ceiling. You cannot move and aim and fire at the same time. Usable up to Gold or Platinum rank, but you will struggle against claw players in higher ranks.
3-Finger Claw (Best for Headshots)
This is the competitive standard for 2026. You add your left index finger to control the left fire button or Gloo Wall. This frees up your right thumb to aim while your left index fires. Result: you can drag the fire button while keeping your aim steady.
3-finger claw is the minimum setup for consistent drag headshots. Most headshot-focused players use this layout.
Starting sensitivity for 3-finger claw: General 95, Red Dot 90, 2x Scope 80, 4x Scope 65, Sniper Scope 38, Free Look 65.
Warning: The first 2-3 days of switching to 3-finger claw will feel worse than 2-finger. This is normal. Your muscle memory needs time to adjust. Commit to at least 7 days before judging the layout. Most players see clear improvement by day 5-7, and by day 14, going back to 2-finger feels uncomfortable.
4-Finger Claw (Pro Level)
Both index fingers rest on the top corners of the phone, both thumbs handle movement and aiming below. This gives you the fastest reaction time — you can crouch, fire, move, and jump all at the same time. But it’s hard to learn and can cause hand cramps. Recommended only for serious competitive players who plan to invest weeks of practice.
Best Character Combination for Headshots
The right character skills can give you an edge in landing headshots. Here are four combinations for different playstyles:
Aggressive Rush Combo
- Active: K (Master of All) — EP to HP conversion. Sustain yourself between back-to-back fights.
- Passive: Jota — Recover HP on every kill. Essential when you are rushing multiple enemies.
- Passive: Laura — Accuracy boost when scoped. Your first shots connect more often.
- Passive: Maro — Damage increases with distance. Helps with mid-range headshots.
One-Tap Rush Combo
- Active: Tatsuya — Aggressive dash for pushing enemies.
- Passive: D-Bee — Accuracy and fire rate increase while moving. Critical for hitting headshots while strafing.
- Passive: Wolfrahh — Headshot damage increases with every kill you get in the match.
- Passive: Luna — Firing speed boost for faster one-taps.
Sniper Headshot Combo
- Active: Alok (Drop the Beat) — Healing aura + movement speed for repositioning after a shot.
- Passive: Laura — Scoped accuracy boost. Perfect for AWM and Woodpecker users.
- Passive: Rafael — Enemies can’t hear your sniper shots. They don’t know where you are shooting from.
- Passive: Moco — Tags enemies you hit. Track them through walls and finish them off.
Beginner-Friendly Combo
- Active: K (Master of All) — Simple to use. Just toggle EP mode for healing.
- Passive: Jota — Every kill heals you. Very forgiving for new players who take damage often.
- Passive: Kelly — Sprint speed boost. Helps you reposition and escape bad fights.
- Passive: Andrew — Armor lasts longer. Lets you survive more hits while you are still learning.
Game Settings to Optimize
Before you even touch sensitivity, make sure your game settings are optimized for performance. Lag and frame drops are the biggest enemies of headshot accuracy.
| Setting | Recommended | Why |
|---|---|---|
| Graphics | Smooth | Maximum FPS with minimum lag. |
| High FPS | ON / Ultra / Max | More frames = smoother drag = better aim accuracy. |
| Aim Precision | Precise on Scope | Tighter crosshair when using scopes. |
| Shadows | OFF | Removes visual clutter and improves FPS. |
| High Resolution | OFF | Better performance, especially on mid/low-end phones. |
| Auto Aim | ON | Helps with initial target lock before you drag. |
| Quick Weapon Switch | ON | Essential for M1887 one-tap combos — shoot, switch, shoot. |
Set Graphics to Smooth even if your phone can handle higher settings. The extra FPS is worth more than prettier visuals when you are trying to land headshots.
7-Day Practice Routine for One-Tap Headshots
Knowing the settings and techniques is only half the battle. You need to build muscle memory through structured practice. Here is a day-by-day plan:
Days 1-2: Straight Drag Only
- Weapon: MP40 only
- Location: Training Island, stand 15 meters from a dummy
- Drill: Practice only the straight vertical drag. Aim at chest, tap fire, drag up.
- Goal: 5 consecutive headshots using the exact same drag motion
- Rules: Do not change sensitivity. Do not switch weapons. Focus only on consistency.
- Time: 20-30 minutes per day
Days 3-4: Add J-Drag and M1887
- Continue MP40 straight drag practice for 10 minutes as warm-up.
- Switch to M1887. Practice J-drag on close-range targets (under 10 meters).
- Keep targets stationary.
- Goal: 3 consecutive M1887 one-tap headshots from different angles — left side, right side, front.
- Time: 20-30 minutes per day
Day 5: Moving Targets
- Use Training Island moving dummy bots.
- Or join a 1v1 custom room with a friend and ask them to run sideways.
- Practice Direction Drag on moving targets.
- Try both MP40 (spray drag) and M1887 (single flick) on moving enemies.
- Time: 30 minutes
Days 6-7: Unranked Matches
- Play 5-10 casual or unranked matches.
- Focus ONLY on landing headshots. Do not worry about winning or placement.
- Before you start, check your headshot percentage in your profile stats. Check again after day 7 and compare.
- If your headshot % went up even by 2-3%, the practice is working.
Week 2 and Beyond
Start using the techniques in ranked matches. Expect some inconsistency at first — that is normal. Your aim will be slightly off in real fights compared to training, but your movement-while-firing and crosshair placement will already feel more natural. After 14 days of consistent practice, most players report that going back to their old style feels genuinely uncomfortable. That means the new muscle memory has taken hold.
10 Common Mistakes to Avoid
If you have been trying to hit one-tap headshots and it’s not working, you are probably making one of these mistakes:
1. Copying a pro player’s sensitivity blindly. Different phone = different touch response = different feel. A sensitivity that works on iPhone 15 will feel completely different on Redmi Note 12. Start from the recommended range for your device and adjust ±5 until it feels right.
2. Using max sensitivity on a low-end phone. High sensitivity on a laggy phone causes aim shake. Your crosshair jumps around instead of moving smoothly. Lower sensitivity gives you more control and more headshots on budget devices.
3. Dragging before firing. The drag and the fire tap must happen at the same time — simultaneously. If you drag first and then fire, the bullets go to the wrong place. If you fire first and then drag, you waste bullets on the body before reaching the head.
4. Keeping your crosshair at body or ground level. This forces you to drag a huge distance upward to reach the head. Keep your crosshair at head height at all times, even when no enemy is visible. Smaller drag = easier headshot.
5. Fire button too big. A fire button larger than 55% causes accidental shots when you turn around or swipe. Keep it between 40-55%.
6. No space around the fire button. If other buttons (jump, crouch, scope, Gloo Wall) are placed too close to the fire button, they physically block your upward drag movement. Leave a clear zone around the fire button.
7. Switching to 3-finger claw and giving up on day 2. The first 2-3 days of claw feel terrible. Your aim gets worse before it gets better. But by day 5-7, it starts clicking. Most players who quit on day 2 were one day away from the improvement kicking in. Commit to 7 days minimum.
8. Using the wrong weapon. SCAR and M4A1 are stable and easy to spray, but their damage per bullet is too low for one-tap kills. Use M1887, AWM, Desert Eagle, or MP40 (for drag spray headshots) instead.
9. Not turning on Quick Weapon Switch. This setting is essential for M1887 one-tap combos. After you fire both shotgun shells, you quickly switch to another weapon and back. Without Quick Weapon Switch enabled, the swap is too slow.
10. Testing new sensitivity in ranked matches. Never do this. Always test in Training Island first for at least 15-20 minutes. Then play 2-3 casual matches. Only go to ranked when the new sensitivity feels natural.
Frequently Asked Questions
What is the best sensitivity for one-tap headshot in Free Fire?
It depends on your phone. For low-end phones (2-3 GB RAM), use General 80-90 and Red Dot 75-85. For mid-range phones (4-6 GB RAM), use General 90-95 and Red Dot 85-95. For high-end phones (6+ GB RAM), use General 95-100 and Red Dot 90-100. Always test in Training Island before ranked.
How to do one-tap headshot in Free Fire?
Aim at the enemy’s chest or shoulder level. Tap the fire button and drag your finger upward on the fire button at the same time. This moves the bullets from the body to the head. The key is timing — drag and fire must happen simultaneously, not one after the other.
Which gun is best for one-tap headshot?
M1887 is the best for close-range one-taps with 100 base damage and 200 headshot damage. AWM is the best for long-range one-tap headshots. Desert Eagle (Clash Squad only) has 90 damage and is great for close-mid range. MP40 is the best weapon to learn drag headshots because of its fast fire rate.
What is the best sensitivity for Free Fire on 2 GB RAM phone?
Use General 80-85, Red Dot 75-80, 2x Scope 70-75, 4x Scope 60-65, Sniper 40-45, Free Look 60-65. Low-end phones need lower sensitivity to avoid aim shake and overshots.
Does sensitivity alone improve headshots?
No. Sensitivity helps your crosshair move at the right speed, but consistent headshots also require good crosshair placement (keeping aim at head level), drag shot technique, weapon choice, and regular practice. Changing sensitivity without learning the drag technique will not give results.
What is a drag headshot in Free Fire?
A drag headshot is a technique where you fire while swiping your fire button upward at the same time. This moves bullets from the enemy’s body toward their head during the spray. It uses the game’s aim assist and recoil system to register headshots more consistently than static aiming. There are three types: Straight Drag, J-Drag, and Direction Drag.
Which character is best for headshots in Free Fire?
D-Bee and Laura are the most popular choices for headshot-focused gameplay. D-Bee increases accuracy and fire rate while moving — critical for hitting headshots while strafing. Laura boosts accuracy when scoped, making first shots connect more often. Combine them with Jota (HP on kill) and K or Alok (healing) for the best headshot combo.
How to improve headshot percentage in Free Fire?
Three things will improve your headshot % the most: (1) Always keep your crosshair at head level even when walking around, (2) Practice the drag shot technique in Training Island for 20 minutes daily, and (3) Use weapons built for headshots — M1887, AWM, MP40. Check your headshot % in your profile stats before and after a week of practice to track improvement.
Is 3-finger claw necessary for headshots?
It is not strictly necessary, but it helps a lot. With 2-finger (thumbs only), you cannot aim freely while firing — which makes the drag technique much harder. With 3-finger claw, your left index fires while your right thumb aims, allowing smooth drag headshots. Most headshot-focused players use 3-finger claw or higher.
How long does it take to get good at one-tap headshots?
With daily practice of 20-30 minutes, most players see a noticeable improvement in 7-10 days. The first 2-3 days may feel frustrating, especially if you switch to claw controls. By day 5-7, the muscle memory starts forming. By 2-3 weeks, the techniques become natural and your headshot rate should be consistently higher.
Last updated: September 2026. Settings are based on OB53/OB54 meta. We update this guide when new updates change the sensitivity system or weapon balance.